Explore how to change your logo size WordPress 5, new methods in 2025 are being used with or without coding. Use the Theme Customizer, custom CSS, or the WordPress Editor to change your logo quickly and easily.
Your website logo size plays a core part in branding your site. That’s why, once you create your logo, your next step towards branding will be to insert that logo into WordPress.
But what if you had done this, and the logo size is not appropriate – it might be too big or too small? If so, read on, as here we have a solution for changing logo size in WordPress.
We will walk through with you 5 easy ways to do it. To change the logo size in WordPress, simply follow the step-by-step process. So, without further ado, let’s dig in.
Logo size WordPress: Does it matter?
Before diving into the methods, let’s quickly cover why logo sizing is so important:
SEO Benefits – A clean, well-sized logo supports better site navigation and user trust.
Brand Identity – A properly sized logo reinforces your business identity.
Responsive Design – The right size ensures your logo looks good on mobile and desktop.
User Experience – Balanced sizing avoids clutter and maintains professional design.
Logo Size WordPress

- Your WordPress theme usually controls the logo size through settings in the Theme Customizer (Appearance > Customize). There may be a slider or input box labeled “Logo Width,” “Logo Height,” or similar that lets you adjust the logo size visually and see changes in real time.
- If your theme does not provide direct controls, logo size can be changed by adding custom CSS. For example, targeting the logo image CSS class (often
.custom-logo) and setting a max-width or max-height property can resize the logo:cssimg.custom-logo { max-height: 100px !important; } - The logo size you set should keep the original aspect ratio to avoid distortion. Changing only the width or height proportionally is recommended.
- There is no universal best logo size because it depends on the theme layout. Many themes recommend sizes like 250px wide by 100px high, or similar.
- For best results, use a high-quality image (preferably SVG or PNG) optimized for the web, keep the file size small (under 50KB), and resize using the theme controls or CSS for clarity and fast loading.
Would you like a detailed guide on how to change the logo size step-by-step?
Can you change the Logo Size WordPress?
Yes, it’s entirely possible to change the logo size in WordPress, and due to this customization option, WordPress feels Better than Other cms. We have covered some posts you can read the comparison of WordPress with other CMS briefly. Once you have selected your WordPress logo size, it doesn’t mean you won’t be able to change it. It’s still possible, and here we will walk you through implementing these methods. All are super easy, and we are sure you will find yours.
Before digging in, we want to mention that you should always use SVG format for your logo. One of the main reasons for doing this is that it’s the most lightweight and will also help you change its size while maintaining the quality of the logo.
How to Change Logo Size WordPress?
So, let’s dive into the process and find out how to change WordPress’s logo size. We are about to state the 5 exciting ways. However, which method you choose depends entirely on your preference or ease.
5 proven methods to change logo size in WordPress:
- WordPress Customizer
- Theme Settings
- CSS Code
- Plugins
- Header File Editing
So, let’s find out about them together.
1- Using WordPress theme settings:
One of the simplest and best ways to change logo size in WordPress is by using a WordPress theme customizer. Though this method is recommended, the implementation ultimately depends on whether your theme supports it. If you are using a popular theme like Divi or Astra, you will surely be able to do that.
Furthermore, plenty of other themes are available, and it wouldn’t be possible for us to describe each one. But, we created this guide practically so that you could find and apply these settings to any of them.
So, if you are using the Astra theme, then to change your WordPress logo size, all you have to do is
- Log in to your WordPress dashboard and then customize using the Appearance section.
- A screen will appear where you will find the “header builder” option. Just click on it.
- And here you go, the new screen will show up where you would see the option of “site title & logo” under the general settings.
- Now, you can customize the size of your WordPress logo depending on your needs.
- Before submitting the Save Changes button, preview it to check how it looks.
- The size can also be customized using pixels, so it’s totally up to you, and once you are satisfied with the results, you can save it.
- That’s all; you are all done.
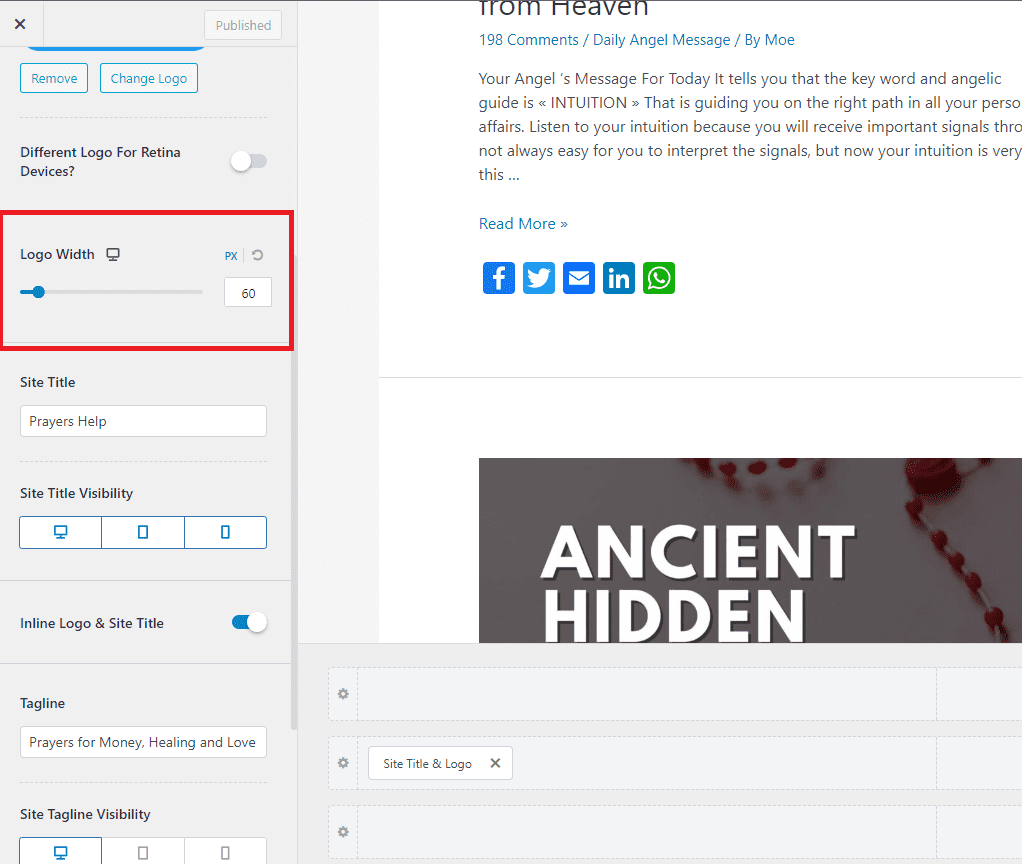
Remember, the process to change the logo size WordPress will remain the same for any other theme, just like the Astra theme. But you may find some similar or extra options. For example, if you use a Divi theme, you will go to the theme customizer. Next, you will find an option for “header and navigation.” Here you go, under the primary menu bar, you can adjust the size.
So, the process will remain the same for every theme. All you have to do is find the appropriate options to make it happen.
2- Using Custom CSS classes:
What would you do if your theme doesn’t support the theme mentioned above? Yes, here is another way that needs a little more concentration to do it. But if you follow the steps below carefully, it’s easy and fast.
So let’s dig in.
- Open the homepage of your WordPress site and right-click on the page, and then select the Inspect option. Another way is to press Ctrl+U to open the code for the homepage.
- A code page will appear, and on the top of it, you will find an icon “select an element” that will look like the mouse pointer available in the top bar of the coding portion on the right side.
- Next, hover your mouse over your website’s logo, and a custom CSS code will appear.
- Save this code to any of the notepads because later, you will use this code to change the WordPress logo size.
- Once you get the code, now go to the theme customization section using the appearance option at the left sidebar.
- You will see the “Additional CSS” click on it, and a small screen will appear where you will paste your copied code.
- Remember, before you click Save Changes, you must change the maximum height of your log because the copied code will show the same logo size you already have.
- Once done, push the publish button, and you are good to go.
You can use the code given below. Normally, it works on all sites but if not in your then while inspecting, note the class or element name according to your site code, and change the class name then, it will work
{
.site-logo img{
height:100px;
width:100px;
}}
on this site logo name and You have to change the height and width to change the size of the logo. I love doing things with Custom CSS on my websites because it won’t affect site speed as compared to a Plugin, etc.
You can play around with the logo width or size area to find the perfect fit size for your WordPress logo. Still, we recommend you try the first method of using custom theme settings to save yourself from any hassle of coding. But if you still need to find those settings, then using custom CSS classes is your pick.
3- Using a Plugin:
Since we are discussing how to change the logo size WordPress, it would be impossible not to talk about a Plugin. As there is a plugin, there is a way. So, we recommend trying a plugin named “CSS Hero” for this logo customization. The Plugins in WordPress are Something like magic; you can do whatever you want.
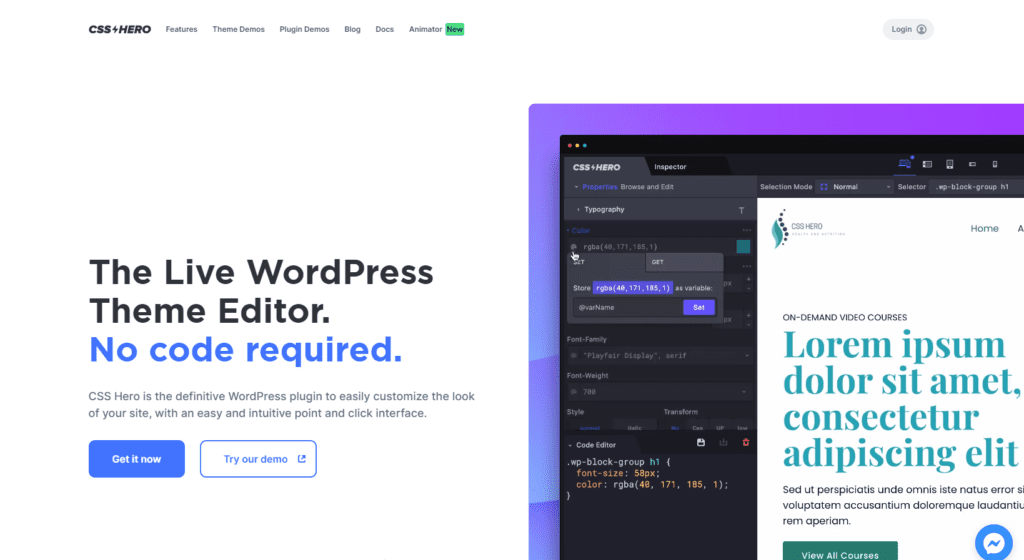
This plugin allows you to render the WordPress logo sizes without writing a single piece of code. And here is how?
- First of all, log in to your WordPress dashboard to install and activate the plugin
- Once done, you will find a feature of “Customize with CSS Hero” at the top bar of your site.
- Just click on it, and a page will appear where you can see the different customization methods options.
- If you need to change the logo size WordPress, click on your logo and the left side of the plugin menu, find the option “show advanced props,” and click on it.
- Once you click and here you go. Under the” measures” tab, you will find maximum and minimum logo width options.
- You will automatically see the changes once you adjust the size of the logo.
- So, when you are satisfied with the results, remember to save changes.
We want to mention here that using the CSS hero plugin will show you the changes instantly as you make them. That’s why it will save you lots of hassle. Now, it entirely depends on you whether you are comfortable with using a plugin or not.
4. Change Logo Size via the WordPress Editor
With block themes or new editors:
- Navigate to Appearance > Editor in the Dashboard.
- Find the Site Navigation or directly click the logo on the visual preview.
- Click the logo block, then use the resizing slider or size controls to adjust the logo size.
- Save changes when done.
If no logo block exists, add one by inserting the “Site Logo” block and resize it.
Save changes when done.
If no logo block exists, add one by inserting the “Site Logo” block and resize it.
5. Editing Theme Header File (Advanced)
For developers:
- Access header.php or the theme builder.
- Locate logo code
<img>and set width/height attributes. - Example:
<img src="logo.png" alt="Site Logo" width="180" height="auto">
Always use a child theme to prevent changes from being overwritten.
Best Practices to Change Logo Size in WordPress
- Ideal desktop logo: 250px x 100px
- Mobile logo: 120px x 60px
- Use PNG or SVG for high-quality scaling
- Test responsiveness on all devices.
If you want a responsive, professional logo setup, start with the customizer and refine using CSS for pixel-perfect results.
Why you must test on every device
- Different screen sizes and densities change perceived size and clarity.
- Headers usually behave differently (sticky, collapsed, centered, or hidden) on small viewports.
- Performance and accessibility issues are most visible on slower mobile networks or small screens.
Practical step-by-step testing workflow
- Prepare assets
- Provide an SVG for crisp, scalable logos (best when your logo is vector). Also export a PNG fallback and a 2× PNG for retina (
logo@2x.png). - Keep file size small (aim <100 KB where possible). Consider WebP for smaller files with a fallback.
- Provide an SVG for crisp, scalable logos (best when your logo is vector). Also export a PNG fallback and a 2× PNG for retina (
- Apply responsive CSS / markup
- Add responsive CSS (examples below). If your theme already has logo controls (Customizer/Theme Options), use them first.
- Preview in WordPress Customizer
- Dashboard → Appearance → Customize. Use the device icons (desktop/tablet/mobile) to preview live changes.
- Use a browser device emulator
- Open Chrome/Edge/Firefox DevTools → Toggle device toolbar (Ctrl+Shift+M) → test multiple device presets and orientations. Also, test rotation.
- Test on real devices
- Check at least one iPhone (Safari) and one Android (Chrome). Real-device rendering can differ from emulators.
- Simulate slow networks
- In DevTools Network tab, set throttling to “Fast 3G” to see how logo loads under constrained conditions.
- Test behavior during interactions
- Resize window, scroll (sticky header), open menu (mobile menu may hide or overlap logo) and test zoom levels on mobile.
- Run quick audits
- Use Lighthouse (in DevTools) for performance & accessibility hints. Look for image/content issues.
- Clear caches
- Purge CDN and page caches after changes; retest on a clean load.
Recommended asset strategy (practical)
- SVG: primary asset when possible (sharp at any size).
- PNG @1x & @2x: good fallback for bitmap logos (e.g., photos within logo).
- WebP: smaller file sizes; use
picturethe element for fallback. - Include
alttext for accessibility.
Example picture fallback:
<picture>
  <source type="image/webp" srcset="/assets/logo.webp">
  <img src="/assets/logo.png" srcset="/assets/logo@2x.png 2x" alt="Your Site Name" class="site-logo__img">
</picture>
WordPress note: many themes output the logo with the class custom-logo or custom-logo-link — Inspect your site to confirm.
Responsive CSS examples
Replace .site-logo img with your theme selector (e.g., .custom-logo, .site-branding img, .custom-logo-link img).
Basic responsive rules:
/* Base */
.site-logo img {
  max-width: 250px; /* desktop default */
  height: auto;
  display: block;
}

/* Tablet */
@media (max-width: 1024px) {
  .site-logo img { max-width: 180px; }
}

/* Mobile */
@media (max-width: 480px) {
  .site-logo img { max-width: 120px; }
}

/* Prevent stretching if parent sets a height */
.site-logo { line-height: 0; }
Retina-ready markup (if you must add manually):
<img src="/logo.png" srcset="/logo.png 1x, /logo@2x.png 2x" alt="Site Logo" class="site-logo__img">
How to fix the common problems
- Logo blurry on Retina → provide a 2× image via
srcsetor use SVG. - Logo too large on mobile / overlaps menu → add mobile media query to reduce
max-widthOr hide/replace with a compact logo. - Logo shifts when the header becomes sticky → inspect sticky header CSS; the sticky state may change padding/margins. Add CSS to re-scale the logo in
.is-stickyor your theme’s sticky class..site-header.is-sticky .site-logo img { max-width: 160px; } - Logo not accessible (background-image used) → background images aren’t read by screen readers. If the theme uses
background-image, add anaria-labelon the link or add visually-hidden text inside the anchor. - Changes not visible → clear browser cache, WordPress cache plugin, and CDN caches.
- Slow loading logo → optimize (compress or use WebP), use CDN for delivery, avoid unnecessarily large raster images.
Checklist before you finalize the Logo size
- Logo looks crisp on desktop, tablet, and mobile.
- File size optimized (<100KB preferred).
- Retina version or SVG provided.
- Header behavior (sticky / collapse / mobile menu) checked.
- Accessibility:
alttext present; background-image logos have an accessible label. - Changes tested on at least two real devices and via DevTools.
- Cache/CDN purged and re-tested.
Conclusion
Your logo is the visual cornerstone of your WordPress website. Whether you’re running a blog, business site, or eCommerce store, having the right logo size ensures professional branding and a better user experience.
We explored 5 proven methods to change logo size in WordPress:
- WordPress Customizer
- Theme Settings
- CSS Code
- Plugins
- Header File Editing
For most users, starting with the Customizer or theme settings is the easiest. If you need more control, CSS and plugins provide flexibility.
Pro Tip: Always test your logo on desktop, tablet, and mobile before finalizing.
Changing your WordPress logo size doesn’t have to be complicated. Whether you use the Customizer, theme settings, CSS, plugins, or direct edits, you have full control over your site’s branding.
If you want a responsive, professional logo setup, start with the customizer and refine using CSS for pixel-perfect results.
Well, Why Change the Size of the Logo in WordPress?
Since we had talked about how to change the logo size in WordPress, how about if you need clarification on why you need to change the size of WordPress? Though you know we are wrapping up, here are our quick notes.
Remember, the logo sizes are only sometimes perfect once you upload them to WordPress. That’s why you need to change the logo size in WordPress to give it the perfect sizing position. Luckily, the process is straightforward, as we stated above. So, apply any of them as per your ease and make sure your logo remains in the correct size.
We recommend you use your theme customization, but if your theme doesn’t support these functionalities, you can go for the CSS classes. Among all, using a plugin is your go-to method if you are a beginner to WordPress or looking for a more convenient way.
Have you got any queries? Do write in the comment section or contact the team. Tipsoont would love to assist you.
Till Next!
FAQs (change logo size WordPress)
What is the ideal logo size for WordPress websites?
The typical recommended logo size is around 250-300 pixels wide by 100-150 pixels high, but this varies based on your WordPress theme and site layout.
How can I change the logo size in WordPress?
You can change the logo size using the WordPress Customizer if your theme supports it, by adding custom CSS, or using the Full Site Editor for block themes.
Which image formats are best for WordPress logos?
PNG and SVG are the best formats for logos as they support transparency and scale well without losing quality.
What happens if my logo is too large or too small?
A logo that’s too large can slow site loading and overpower other content, while a small logo may not be noticeable or convey branding effectively.
- Astra Vs Avada – Which is The Best WP Theme for your site ? (2025 update) - September 27, 2025
- Squarespace Template Change Guide for Versions 7.0 and 7.1 in 2025 - September 17, 2025
- Best WordPress Books, Custom CSS Tips & Elementor Free Guide (2025) - September 17, 2025





2 Comments